Clamping and Curing: Proper Pressure and Time for Different Adhesives
How much clamping pressure and time do I need for my glue to cure properly?
On this page
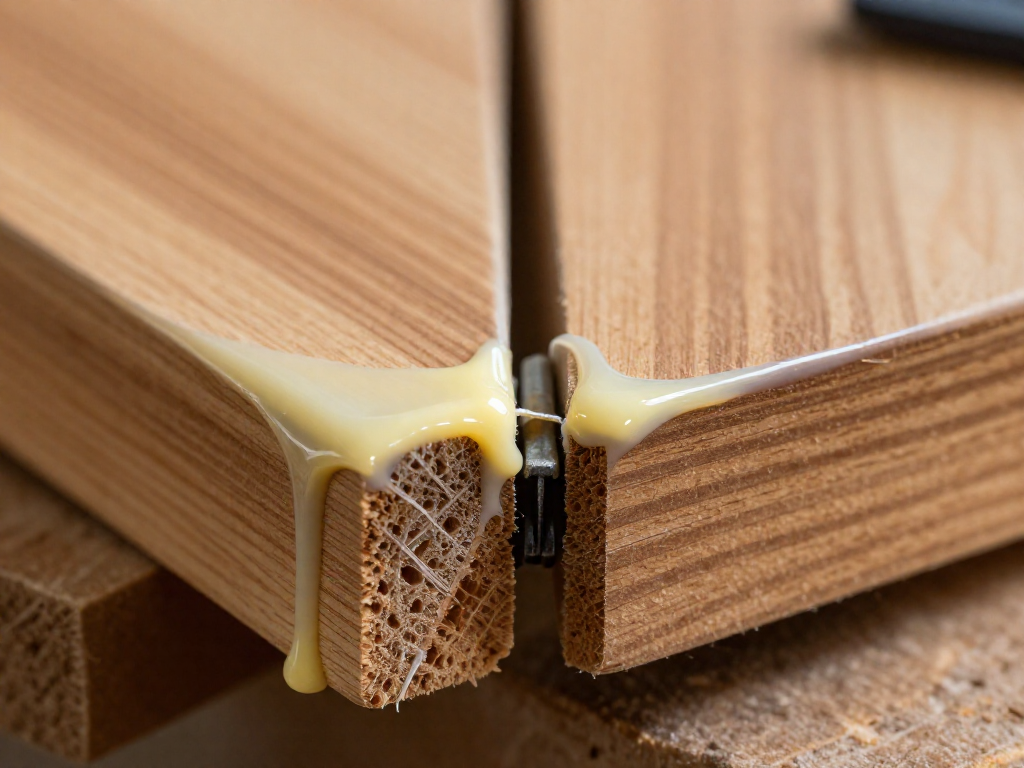
Start with the common DIY frustration of glue joints failing, and immediately address the two mistakes: wrong clamping pressure and premature stress. Promise clear numbers for common adhesives.
Why Clamping Pressure Matters More Than Tightness
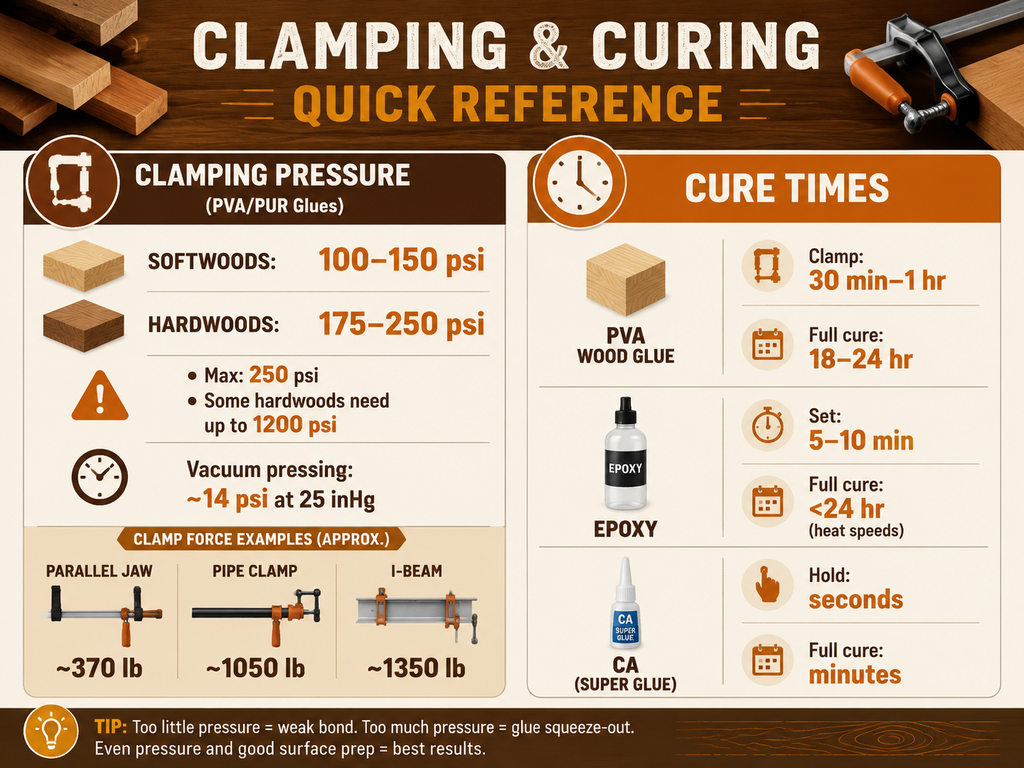
Clamping pressure isn't about how hard you crank—it's about pounds per square inch (psi) on the joint. Too little pressure leaves a thick glue line that weakens the bond; too much squeezes out the adhesive and starves the joint. For PVA wood glues, Franklin International recommends 100–150 psi for softwoods and 175–250 psi for hardwoods (Wood Magazine). Most joints max out at 250 psi. The goal is a glue line under 5 mils thick.
Clamping Pressure by the Numbers: PVA and Polyurethane
When you’re gluing up a tabletop, you want numbers, not guesswork. Dale Zimmerman of Franklin International, the maker of Titebond, recommends clamping softwoods like pine or cedar at 100 to 150 psi, and hardwoods such as oak and maple at 175 to 250 psi (Wood Magazine). Going higher doesn’t make a stronger joint—above 250 psi you risk squeezing out so much adhesive that the glue line starves, weakening the bond.
Polyurethane glues like Gorilla Glue follow the same pressure rules, even though their tensile strength hovers around 3,000 psi. The bondline still needs to be thin and continuous, so clamp to the wood’s density, not the glue’s ultimate strength.
The biggest surprise? Vacuum clamping at 25 inches of mercury pulls only about 14 psi—far below those numbers. Yet it works beautifully because the pressure is absolutely uniform across the joint, eliminating thick spots and ensuring a consistent, paper-thin glue line. It’s a reminder that even pressure, not brute force, often matters most.
Epoxy and Cyanoacrylate (CA): Different Rules
Forget the high-pressure psi charts that govern PVA and polyurethane glues—epoxy and cyanoacrylate (CA) play by their own rules. Epoxy demands only enough clamping to immobilize the joint until it sets. Over-clamping can squirm parts out of alignment without any real risk of a starved bond; in many cases, thickened epoxy or gravity alone holds parts securely (WEST SYSTEM). Set times range from about 5 minutes for fast formulas to 10 minutes for thicker pastes, but a full cure usually takes up to 24 hours—though a little heat can cut that wait dramatically.
CA glues are even less demanding. Curing begins the moment you press the pieces together, typically within seconds. Hand pressure is all it takes until handling strength is reached, making clamps unnecessary for most small repairs. For either adhesive, the takeaway is simple: hold without movement, skip the heavy force, and let the chemistry do the work.
Clamp Time vs. Full Cure: Don’t Rush the Repair
Glue failures often trace back to one mistake: treating clamp time as cure time. Clamp time is just the point where the adhesive holds itself together—it is never the signal to apply load.
PVA wood glue sets in 30–60 minutes but needs 18–24 hours for full strength. Stress the joint during that window and you’ll invite creep, permanently weakening the bond.
Polyurethane behaves similarly. Though moisture-cured formulas feel solid faster, they still need a 24-hour cure to reach their full 3,000–3,500 psi toughness.
Epoxy is especially deceptive. Formulations set in as little as 5 minutes, yet mechanical properties develop over the next 24 hours. Loctite’s epoxy, for example, sets in about 10 minutes but requires nearly a full day to fully cure (Loctite). Heat can accelerate the process, but never skip the full cure for any load-bearing joint. Early loading leads to creep, reduced strength, and eventual failure.
Wait the full cure. The clamps can come off early, but the strain should not.
The Over-Tightening Trap
Tightening clamps until you can't turn them anymore is a common mistake. Excessive pressure actually squeezes out too much adhesive, creating a starved, weak joint. Wood Magazine notes the safe maximum for most wood joints is 250 psi, and Titebond's tests show an optimal glue line of just 5 mils or less. Signs you've gone too far: excessive squeeze-out, dented wood, or a joint that shifts under pressure. Aim for manufacturer psi charts—not your muscle memory.
Practical Tips for Getting Pressure Right at Home
For large panels, place a clamp every 6–8 inches to prevent weak spots. A parallel-jaw clamp generates about 370 lb of force, a pipe clamp roughly 1,050 lb (Sawmill Creek); divide by joint area to approximate psi. Cauls distribute pressure and guard against marring. For small repairs, firm hand pressure with rubber bands or tape works for CA glue or small epoxy bonds.
Sources
- Vacuum Psi vs. Glue Specs. - WOODWEB's Architectural Woodworking Forum — woodweb.com
- The Ultimate Guide to PVA Wood Glue — mtcopeland.com
- Take it easy with clamping pressure — woodmagazine.com
- Reality-Check Requested: Glue Clamping Pressure Gone Wild??? — sawmillcreek.org
- Glue pressure - FineWoodworking — finewoodworking.com
- The Importance of Clamping During Adhesive Cure — permabond.com
- Epoxy: Everything you need to know about it — loctiteproducts.com
- Bonding And Clamping — westsystem.com
FAQ
Can you use too much clamping pressure?
Yes, you can use too much clamping pressure, which squeezes out adhesive and leads to a starved, weak joint. For PVA wood glues, Franklin International recommends 100–150 psi for softwoods and 175–250 psi for hardwoods, while some dense hardwoods can handle up to 1,200 psi. Titebond’s manufacturer notes that clamp pressure is really limited only by the wood’s compressive strength, but the critical factor is a glue line no thicker than 5 mils—excessive pressure doesn’t guarantee a stronger bond.
How long should I leave clamps on when using wood glue?
For regular PVA wood glue, keep clamps on for 30 minutes to 1 hour while it sets, but allow a full 18 to 24 hours for the bond to reach maximum strength before applying stress.
Do you need to clamp epoxy?
Not always—the real requirement is to prevent the parts from shifting during cure. West System states that any method of clamping is suitable as long as movement is prevented, and sometimes thickened epoxy or gravity alone is enough. If you do clamp, light pressure is typical, and curing can be accelerated with heat.
What is the best way to clamp irregular shapes?
The best approach is to use a method that conforms to the irregular shape and holds the parts securely without slipping. Flexible options like vacuum bagging, stretch wrap, or rubber bands can apply even pressure over curves. Alternatively, create custom clamping blocks (cauls) that match the profile to distribute force evenly.
See also
- Surface preparation guide for better adhesive bonding
- Choosing the right glue for plastic-to-metal repairs
- How to test if your adhesive bond is strong enough
Related articles
Common Surface Prep Mistakes That Ruin Adhesion: Troubleshooting Guide
Why did my glue not stick even though I did everything right?
Jul 22, 2026 · 8 min read
Joint Design for Strong Bonds: Butt, Lap, Scarf, and More
How does the shape of the joint affect glue strength?
Jul 22, 2026 · 12 min read
Primers and Adhesion Promoters: When and How to Use Them
Do I need a primer before gluing certain materials, and what does it do? Learn when silanes, titanates, and proper prep make or break your bond.
Jul 22, 2026 · 6 min read