Sanding for Adhesion: When, How, and How Grit Affects Bond Strength
How does sanding improve adhesive bond strength, and what grit should I use?
On this page
You followed the instructions, used the strongest glue, but the bond failed. The missing step? Proper sanding. This article explains the science behind mechanical interlock and provides data-backed grit recommendations to turn weak bonds into unbreakable ones.
Why Sanding Is the Most Underrated Step in Adhesive Bonding
You followed the label to the letter—cleaned, mixed, clamped—and still the joint popped apart. That moment of frustration is almost always traced back to one missing step: sanding. It’s not about scuffing things up; it’s about giving the adhesive something to bite into.
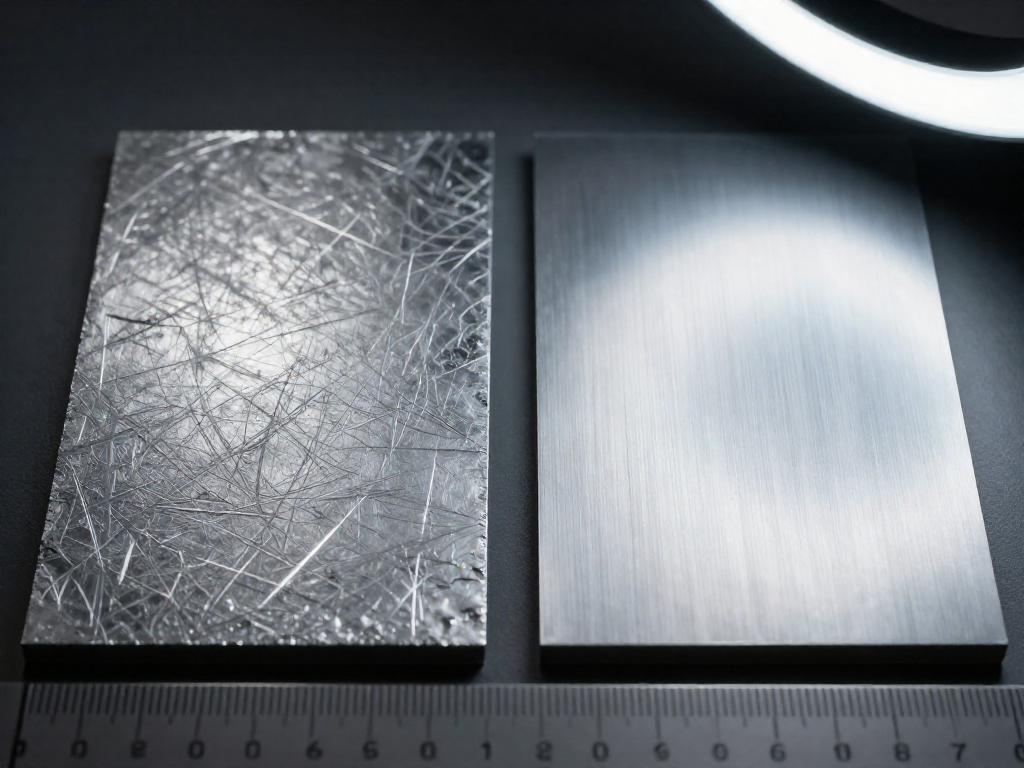
Sanding creates a mechanical key. At the microscopic level, it carves peaks and valleys that dramatically increase the surface area and let the adhesive flow into a labyrinth of tiny crevices. As it cures, the adhesive locks into this topography, anchoring the two surfaces together far better than a smooth, polished face ever could.
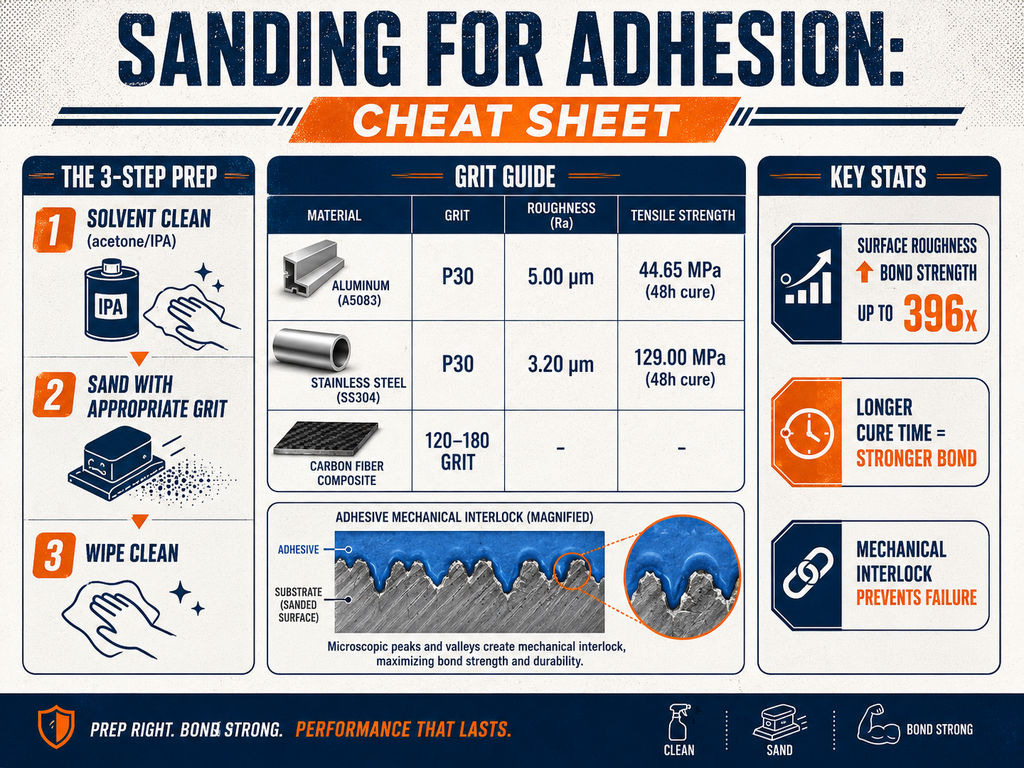
The difference isn’t subtle. When researchers at the Polytechnic University of Hong Kong abraded aluminum and stainless steel with a coarse P30 grit, bond strength jumped by roughly 73% for the aluminum—and an astonishing 396 times for the stainless steel compared to a minimally prepared surface (PolyU study). Skip the sanding, and you’re leaving most of your glue’s holding power on the table.
The Science: How Sanding Creates a Mechanical Interlock
When you slather adhesive onto a perfectly smooth surface, you’re banking on a vanishingly thin layer of glue clinging by chemical attraction—what chemists call secondary bonding. It’s fragile. Sanding overturns that. It carves a landscape of microscopic peaks and valleys, called asperities. Adhesive flows into those crevices while still liquid, then hardens, physically keying into the surface like a thousand tiny dovetails. That’s a mechanical interlock, and it’s dramatically tougher than relying on chemical bonds alone. No matter how sophisticated your epoxy, without that interlock you’re leaving most of its strength on the table.
Surface roughness, measured as Ra (the average deviation from the mean line), is the currency here. As you abrade a substrate, the contact area explodes. Each scratch and pit becomes a new bonding site. But it’s not just about area—it’s about wetting. Adhesive can only lock into features it can physically reach. A well-chosen grit creates a texture that the adhesive wicks into before curing, maximizing intimate contact without trapping air in deep gullies the glue never fills. Too coarse a finish and the adhesive may bridge across peaks, never touching the valleys; too fine and there’s nothing to bite into.
The numbers hammer this home. Research from the Hong Kong Polytechnic University compared aluminum (AL5083) and stainless steel (SS304) bonded with epoxy after mechanical abrasion. Simply optimizing surface roughness sent tensile strength skyrocketing. For the aluminum, the strongest bond gained about 73% over the weakest rough condition. For stainless steel, the leap was a staggering 396 times—from a barely-there 0.33 MPa to 129 MPa (Hong Kong Polytechnic University). That’s not a typo. Mechanical interlock transformed a joint that could be peeled by hand into one that rivals a welded connection. Sanding isn’t a minor step—it’s the mechanism that unlocks the full potential of any structural adhesive.
When You Absolutely Must Sand (and When You Can Skip It)
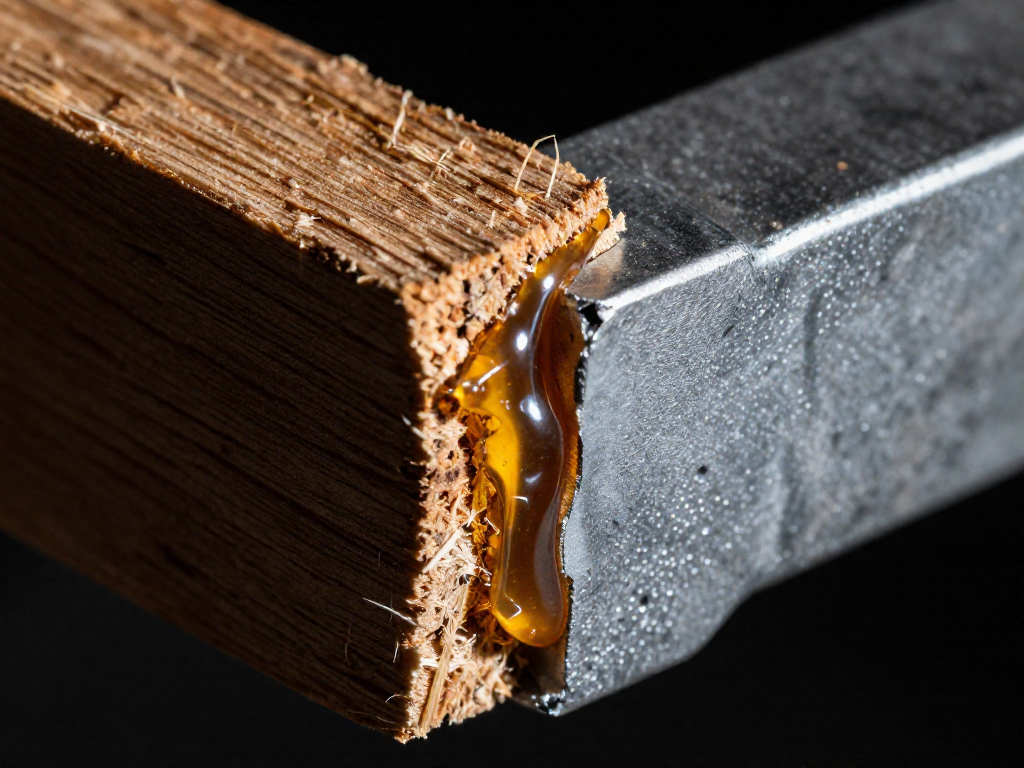
Metals are the big one—aluminum, steel, stainless. They all form an oxide layer that glue hates, and a slick surface gives adhesive nothing to grab. Sanding strips off that weak oxide and cuts in a tooth, boosting bond strength dramatically. In one study, sanding stainless steel with coarse P30 grit lifted bond strength by an eye-popping 396 times over a minimally prepared surface (research from Hong Kong Polytechnic University). For aluminum, the same approach doubled the bond.
Composite materials like carbon fiber or fiberglass come with mold release agents that leave a greasy film—sanding removes it and exposes fresh fibers for the glue to grip.
The bead test makes the call simple: if water beads on the surface, you’ve got low surface energy, and sanding before cleaning gives the adhesive a fighting chance. A quick scuff with fine sandpaper can turn a slick refusal into a bond that holds.
But you don’t always need sandpaper. Chemically etched or factory-primed parts are already prepared; sanding would scrub away that primer and do more harm than good. If water sheets off and the surface feels clean, skip the sanding and move straight to glue.
Grit Selection: The Surprising Numbers Behind Bond Strength
Stop reaching for that 220-grit paper. When you're bonding metal, the numbers say you want something that looks like it belongs in a machine shop, not a woodworking class. The myth that finer is better is exactly that—a myth. Adhesive bonds don't cling to glass-smooth surfaces; they need deep, mechanical interlock to grab hold. Pick the right grit, and you can multiply your bond strength by an order of magnitude. Pick wrong, and you're basically decorating your parts before they fall apart.
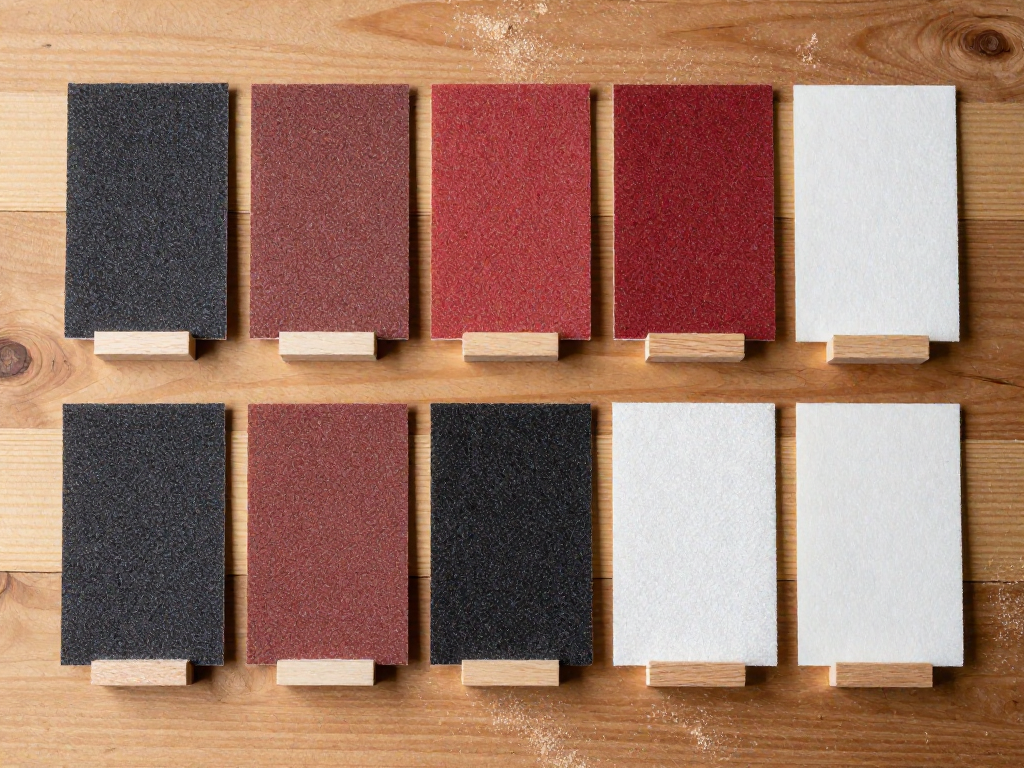
In a 2025 study on aluminum and stainless steel joints, researchers at the Hong Kong Polytechnic University put grit size to the test with a two-part structural adhesive. For aluminum alloy AL5083, a rough P30 grit (Ra ≈ 5.00 µm) produced a tensile bond strength of 44.65 MPa—a 73% increase over the minimum condition. On stainless steel SS304, the same P30 grit yielded a staggering 129.00 MPa, a 396-fold improvement over the weakest bond. Those aren't rounding errors; they're the difference between a bracket that holds and one that drops a load on the floor. The study also confirmed that cure time matters, but the dominant variable was surface roughness. If you're bonding metals that will see real stress, start thinking in terms of 40 to 80 grit. These coarse abrasives tear open the surface oxide and create the deep, jagged topography that gives adhesive room to flow and lock in.
There's a sweet spot, though. Go too coarse and the adhesive can't flow into the bottom of those canyons—air gets trapped, contact area drops, and the bond line becomes a stress-riser wilderness. That's why metal bonding guidelines cluster around 40–80 grit for structural epoxies and acrylics. For composites and plastics, you need a different approach. Aircraft qualification documents show that carbon fiber laminates are routinely prepared with 120–180 grit (hand sanding or light abrasion) before bonding. The same range works well for many plastics: it roughens without tearing out fibers or melting the surface. With softer materials, the goal is micro-roughness, not macro-gouging. A 120-grit paper gives you enough tooth for epoxy to key in, but won't damage the substrate.
Below is a practical starting point for common combinations. Bear in mind that specific adhesives may call for different profiles, so always check the technical data sheet—but this table will keep you out of the "too smooth" danger zone.
| Material | Recommended Grit Range | Notes |
|---|---|---|
| Aluminum (structural) | 40–80 | Aim for Ra ~3–5 µm; coarse silicon carbide preferred. |
| Stainless steel | 40–80 | P30–P60 yields maximum interlock; follow with solvent wipe. |
| Mild steel | 60–80 | Remove mill scale first; a 60-grit flap disc works well. |
| Carbon fiber composite | 120–180 | Hand sand or light machine; avoid breaking fiber continuity. |
| Plastics (e.g., nylon, ABS) | 120–180 | Coarser may gouge; finer won't give enough bite. |
If you're repairing an item that will bear a person's weight or guard against injury, these guidelines are not a substitute for engineering validation. But for most household and shop repairs, matching the grit to the material puts you miles ahead of the "clean and glue" crowd. The bottom line: when in doubt, go a step coarser than your intuition says. Your adhesive will thank you.
The DIY Surface Prep Sequence: Clean, Abrade, Clean Again
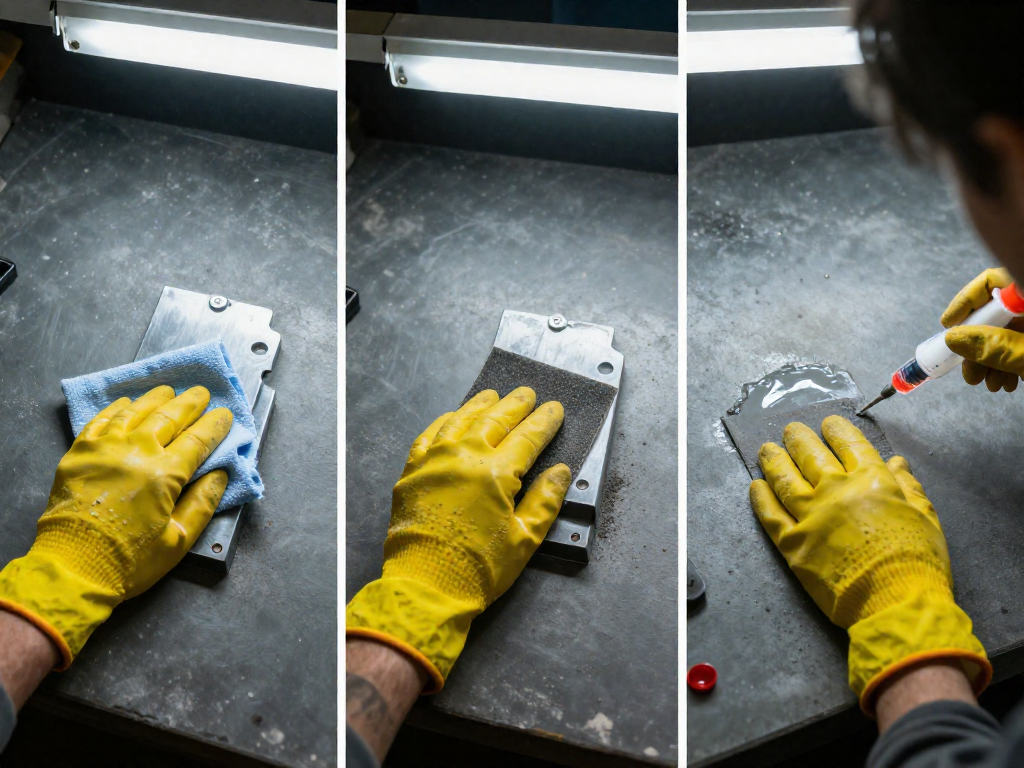
Here’s the order that actually works—and skipping the final wipe is the most common culprit when a bond fails. First, wipe down the surface with acetone or isopropyl alcohol to strip away oils, fingerprints, and loose dirt. Skip this and you’ll just grind contaminants deeper into the surface.
Second, abrade the bonding area with consistent pressure and a cross-hatch pattern to create an even, non-directional scratch profile. A medium-grit sandpaper in the 120 to 180 range gives you real mechanical interlock without gouging—the same category of grit used in aircraft composite prep. Abrasion alone can boost tensile strength by 73% for aluminum and over 300 times for stainless steel compared to a barely prepped surface, so don’t phone this step in.
Third, clear away the sanding dust with a dry cloth or compressed air. Those fine particles act like a release agent if left behind. Finally—and this is the step most DIYers skip—do a second solvent wipe. As Meridian Adhesives emphasizes, the final solvent cleaning removes residual powder and any trace contaminants that would otherwise sabotage the bond.
Time is your enemy after this last wipe: bond immediately to avoid re-oxidation or airborne contamination settling on the fresh surface. Even a few minutes of exposure can weaken the joint, so have your adhesive mixed and ready before you start the final clean.
Material-Specific Sanding Tips: Metal, Plastic, Composite, and More
Each material brings its own quirks to the sanding process, and ignoring them can weaken your bond even after good prep. For aluminum, time is critical: once you expose fresh metal, oxide forms almost instantly. Sand it and apply adhesive within 30 minutes for maximum grip. A coarse abrasion with P30 grit silicon carbide paper generated 44.65 MPa tensile strength on A5083 alloy in one bond study, while a smoother finish cut that nearly in half. Stainless steel is harder, so don't be afraid to go aggressive—the same P30 grit achieved 129 MPa on SS304, a massive jump over finer finishes (research published in Engineering Research Express). If the steel is for a wet or outdoor environment, a quick acetone wipe after sanding helps remove any residual contaminants before bonding.
Plastics demand a lighter touch. Too much pressure or a coarse grit can generate heat and melt the surface, smearing it instead of roughening. Use 180–220 grit and test on a hidden scrap first—some slippery polymers barely respond to sanding at all and may need a flame treatment or plastic primer. Carbon fiber requires extreme care: you want to scuff the resin layer without cutting into the load-bearing fibers. In aircraft bonding, a peel ply plus light 180-grit abrasion is standard, but if you're working with bare laminate, stick to 120 grit and stop the moment the shine disappears.
Concrete and stone often have a weak surface layer called laitance that must go. Sand or grind past it, then follow with a stiff brush and vacuum to remove the fine dust that would otherwise fill the pores you just exposed. Wood benefits from raising the grain: wipe with water, let it dry, then sand smooth with 150 grit to knock down the fuzz. This prevents the adhesive from being starved into the fibers later. No matter the material, a final solvent wipe (acetone or isopropyl alcohol) after sanding and dusting is non-negotiable.
Common Sanding Mistakes That Weaken Bonds
Even a careful sanding job can be undone by skipping the final solvent wipe—leftover dust acts as an invisible release layer, blocking adhesive from reaching the surface. Meridian Adhesives emphasizes a double clean: solvent wipe before sanding to remove oils, abrade, then wipe again with acetone or IPA to lift every particle. Also watch out for contaminated sandpaper; old sheets can transfer silicones or leftover adhesives, sabotaging bond quality. Heavy pressure is another trap—pressing too hard can burnish the surface, smoothing it back down instead of creating fresh peaks.
Grit choice matters. On metal, anything finer than 120 grit rarely provides enough tooth. In one study, switching from a near-polish to P30 coarse silicon carbide increased tensile strength from 25.8 MPa to 44.6 MPa on aluminum, and stainless steel jumped to 129 MPa under the same coarse prep. Ignoring cure time after assembly is the final error: adhesive needs time to flow into the roughness before it sets, and early handling can tear apart what you just built.
Sources
- Towards Reliable Adhesive Bonding: A Comprehensive Review of Mechanisms, Defects, and Design Considerations — pmc.ncbi.nlm.nih.gov
- Tailoring adhesive bonding strength: the role of mechanical abrasion and cure time in aluminum-stainless steel joints — ira.lib.polyu.edu.hk
- Bond Process Qualification Protocols & Adhesive Qualification Guidance for Aircraft Design and Certification — amtas.washington.edu
- Tech Tip 13 – Surface Preparation for Epoxy Bonding: Why It Matters and How to Do It Right — meridianadhesives.com
- Adhesives for Assembly in Manufacturing: A Guide to Bonding Metal, Polymer, and Composite Components — fictiv.com
See also
- Surface Preparation for Plastics: What Really Works
- Choosing the Right Epoxy for Metal Bonding
- The Ultimate Guide to Cleaning Before Gluing
- Joint Design Basics: Maximizing Bond Strength
Related articles
Common Surface Prep Mistakes That Ruin Adhesion: Troubleshooting Guide
Why did my glue not stick even though I did everything right?
Jul 22, 2026 · 8 min read
Clamping and Curing: Proper Pressure and Time for Different Adhesives
How much clamping pressure and time do I need for my glue to cure properly?
Jul 22, 2026 · 5 min read
Joint Design for Strong Bonds: Butt, Lap, Scarf, and More
How does the shape of the joint affect glue strength?
Jul 22, 2026 · 12 min read