Contact Cement: The Secret to Laminate, Leather, and Shoe Repairs
How do I use contact cement correctly to avoid bubbles and weak bonds?
On this page

Struggling with contact cement that bubbles, lifts, or just won’t hold? The secret isn’t in the brand—it’s in the technique. Here’s exactly how to apply, dry, and press it for a bond that lasts.
When Contact Cement Is Your Best Bet
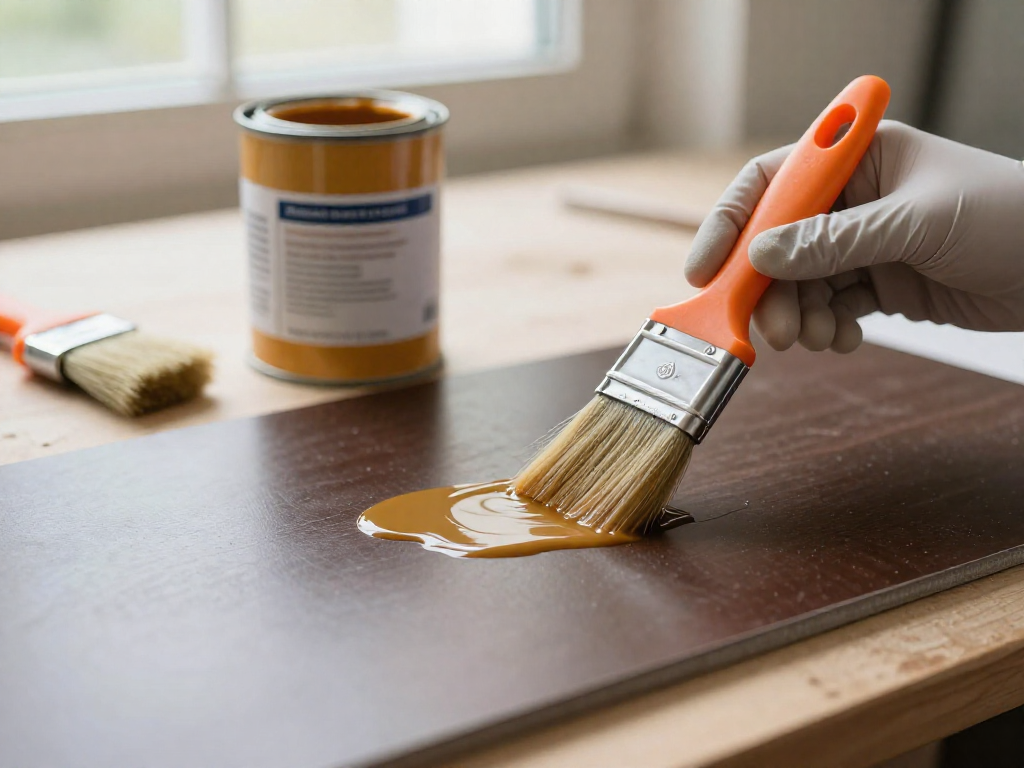
Contact cement excels at bonding flexible, non-porous materials that must stay put yet withstand bending without cracking. Common wins: laminate countertops, leather crafting, and shoe sole repairs. Unlike rigid glues, the elastic bond won’t split when leather flexes (Fine Leatherworking). If your project demands a strong, permanent hold that moves with the material, this is the glue to reach for.
The Two-Coat Secret and the Tacky Test
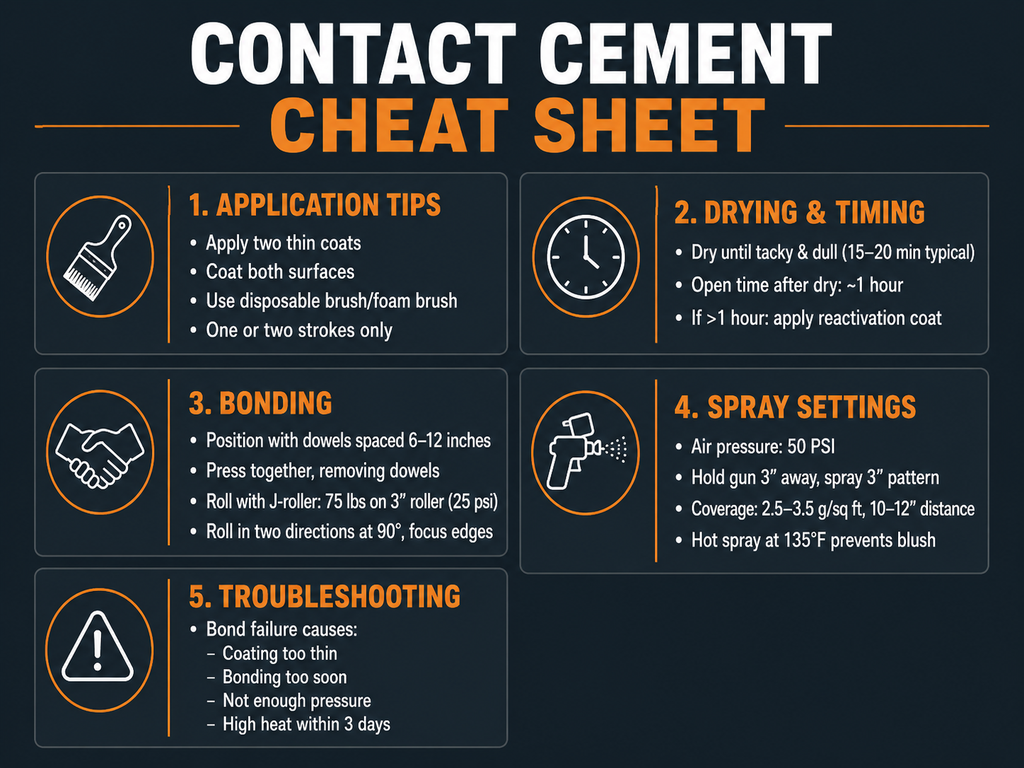
Before opening the can, set up in a well-ventilated area—outdoors is ideal—and wear a respirator rated for organic vapors. Once you’re safe, the biggest mistake you can make is treating contact cement like a one-and-done glue. Porous surfaces drink up the first coat, leaving thin spots that lead to a weak bond. Apply a generous but even first coat and let it dry completely. Then go back with a second thin coat to build a continuous, reliable film. If you try spreading the second coat while the first is still wet, the brush will drag and clump.
Drying time depends on your product and the humidity. Some formulas (like DAP WELDWOOD) need 15–20 minutes; others, like LePage, can be ready in as little as 5–10. Don’t watch the clock—watch the film. It will shift from glossy to dull, and that’s your cue. Now the real test: touch it lightly with a clean finger. It should feel slightly tacky but absolutely must not transfer to your skin. When it’s dull and dry to the touch but still grabs, you’re in the zone.
How you apply it determines whether you get a smooth bond or a lumpy mess. Use a brush or roller and commit to one or two confident strokes—no more. Going back over the same spot repeatedly makes the cement ball up as it starts sticking to itself. Lay it down fast and let it be.
The payoff is in the patience. Joining the surfaces before the solvent has flashed off traps vapors inside the bond. That creates blisters, bubbling, and a joint that’s doomed from the start. Wait until that tacky, dull state on both faces, and when you press them together with firm, even pressure, you’ll get a bond that holds.
Pressure and Positioning for a Bubble-Free Bond
Once both surfaces are tacky and dry, you get one shot at alignment—contact cement bonds instantly, with zero repositioning. For anything larger than a shoe patch, positioning is everything, and the trick is simple: dowels. Lay them across the bottom surface every 6 to 12 inches, then place the top piece on top of the dowels. With everything perfectly lined up, pull the dowels out one by one as you press the surfaces together. This completely prevents accidental contact that wrinkles the material or traps air.
Now, pressure. A quick pat-down isn't enough; the bond requires at least 25 pounds per square inch of even, deliberate pressure to bite. On a 3‑inch J‑roller, that means leaning in with about 75 pounds of force. Start in the center and roll firmly outward toward the edges in all directions, then cross‑roll at 90° to cover every inch. Weak bonds almost always start at the edges, so give them extra attention with your roller or a block of wood wrapped in a cloth.
You have about an hour of open time after the adhesive dries to make the bond. If life gets in the way and the surfaces sit longer, don't try to stick them dry—brush on a fresh thin coat, let it dry again, and proceed. This reactivates the glue and gives you a second chance. Once joined, let the assembly cure undisturbed for at least 2 hours. Avoid high heat—think hot car interiors or direct sun on a black laminate—for 3 full days. Rushing that cure invites failure, especially along those edges you worked so hard to seal (DAP WELDWOOD).
Quick Fixes and Staying Safe
Most bond failures come down to four mistakes: coating too thin, joining too soon, not enough pressure, or exposing the piece to high heat within the first three days (CP Adhesives). If you spot bubbles after pressing, roll them out immediately from the center outward—steady pressure with a J-roller or a 3-inch rubber roller usually takes care of them. For stubborn bubbles that won't flatten, you're better off separating the pieces carefully and reapplying a fresh coat.
Safety is non-negotiable. Always work outdoors or in a space with aggressive cross-ventilation, and wear a respirator rated for organic vapors—standard dust masks won't cut it. Pour the cement into a disposable metal container, because the solvents will eat through plastic. Use a cheap disposable brush or foam brush, and lay down the cement in one or two strokes; overbrushing makes it ball up. Keep a fire extinguisher handy, and you'll avoid the worst surprises.
Sources
- DAP® WELDWOOD® Contact Cement — dap.com
- How to use contact cement: Best practices for using this adhesive — lepage.ca
- Working With Contact Cement | Woodsmith — woodsmith.com
- Contact Cement | Questions and Answers from CP Adhesives — cpadhesives.com
- Spray-Applying Contact Cement — woodweb.com
- DAP® WELDWOOD® Original Contact Cement — dap.com
- TECHNICAL DATA SHEET — dfm.fidelio.ca
- Contact Cement vs. Rubber Cement for Leather | Fine Leatherworking — fineleatherworking.com
FAQ
How long should I let contact cement dry before joining?
It depends on the product and conditions, but typically you let it dry until it's tacky—anywhere from 5 to 20 minutes. DAP WELDWOOD recommends 15–20 minutes, while LePage suggests 5–10 minutes. The key is that it should feel slightly tacky but not transfer to your fingers, and the appearance turns dull.
Can I use contact cement on leather without it cracking?
Yes, contact cement is ideal for leather because it remains flexible after drying. Unlike rigid adhesives like CA glue or wood glue, contact cement moves with the leather and won't crack when the material bends.
What causes air bubbles under laminate after using contact cement?
Air bubbles usually result from bonding before the solvent has fully evaporated, applying too little pressure, or an uneven application. To avoid them, make sure both surfaces are completely dry to the touch and tacky, then press firmly from the center outward, applying at least 25 pounds per square inch of pressure with a roller. Using dowels on large areas helps position the laminate without trapping air.
How much pressure is needed when bonding with contact cement?
A minimum of 25 pounds per square inch of pressure is required. This is equivalent to applying 75 pounds of force with a standard 3-inch J-roller. Roll evenly from the center outward, going over the entire surface in two perpendicular directions to ensure a strong bond.
What if I missed the open time window—can I still bond?
Yes, if the surfaces have dried beyond the typical one-hour open window, you can reactivate the adhesive by applying another thin coat. Let that fresh coat dry until tacky, then immediately join the pieces and apply the necessary pressure. This works because the solvent in the new coat re-activates the dried cement.
See also
- Best glue for rubber to metal
- CA glue vs contact cement for leather
- How to glue laminate countertops
Related articles
UV-Cure Adhesives (Liquid Optical Clear Adhesives): Perfect for Glass and Electronics
What is UV glue, and when should I use it instead of regular super glue?
Jul 22, 2026 · 5 min read
Structural Adhesives: Understanding MMA and Acrylics for Load-Bearing Metal Bonds
What are structural adhesives, and when do I need them over regular glue?
Jul 22, 2026 · 10 min read
Construction Adhesives Showdown: Liquid Nails, PL Premium, and Loctite PL
Which construction adhesive is strongest for subfloor, paneling, and heavy-duty projects?
Jul 22, 2026 · 8 min read