How to Glue Ceramic to Metal: A Step-by-Step Guide for Strong Repairs
What's the best method to glue ceramic to metal for a repair that holds?
On this page
Bonding ceramic to metal isn't just about grabbing any glue—surface prep and the right epoxy make the difference between a repair that fails and one that holds under real conditions.
Preparing the Ceramic Surface: Why You Must Remove the Glaze
For a repair that actually holds, a high-strength epoxy is your best bet—but only if the ceramic surface is prepped correctly. The key? Removing the slick, glassy glaze so the adhesive has something to bite into.
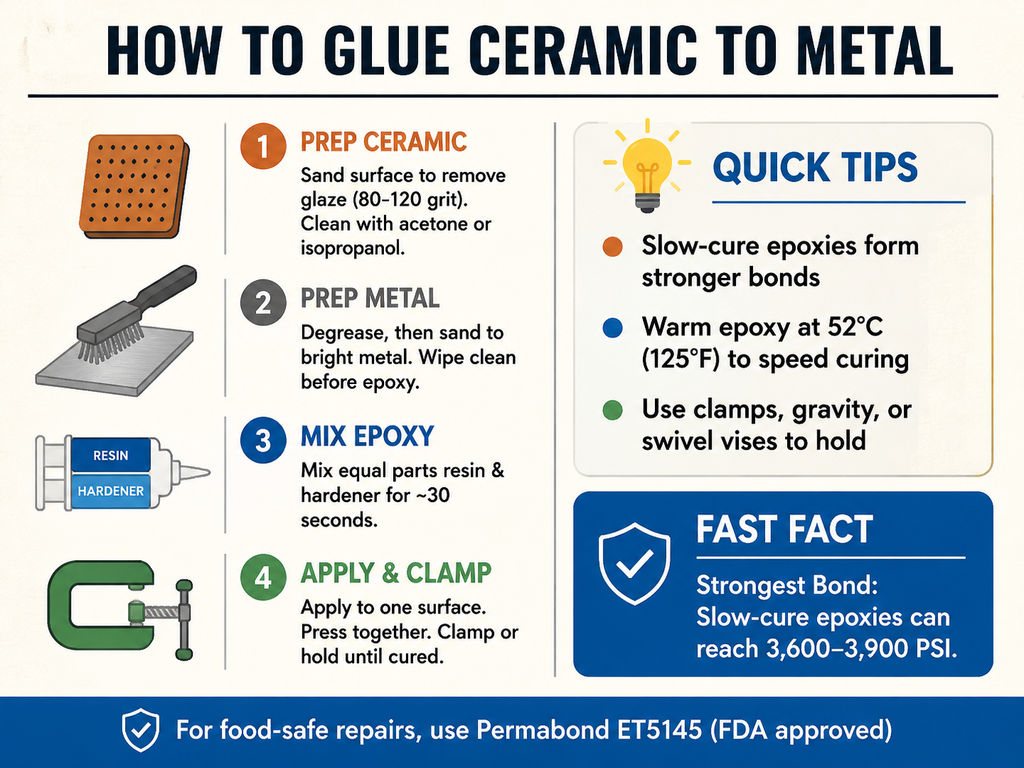
The glaze on most ceramics is impermeable and slick. Epoxy bonds mechanically, not magically: it needs a profiled surface to key into. Without abrasion, you’re essentially gluing to glass, and the bond will fail sooner or later. As Permabond notes, you must remove the glaze by abrasion or grit-blasting, then remove all loose particles. Here’s how to do it right.
Start by degreasing. Wipe the ceramic with a solvent like acetone or isopropanol to strip away hand oils, dirt, and residues. This step is best done before sanding, so you don’t grind those contaminants into the surface. For badly soiled items—think old kitchenware or machine parts—a pre-clean with MEK or trichloroethylene is worth the extra effort; just ensure you’re working in a well-ventilated area, as these are strong solvents.
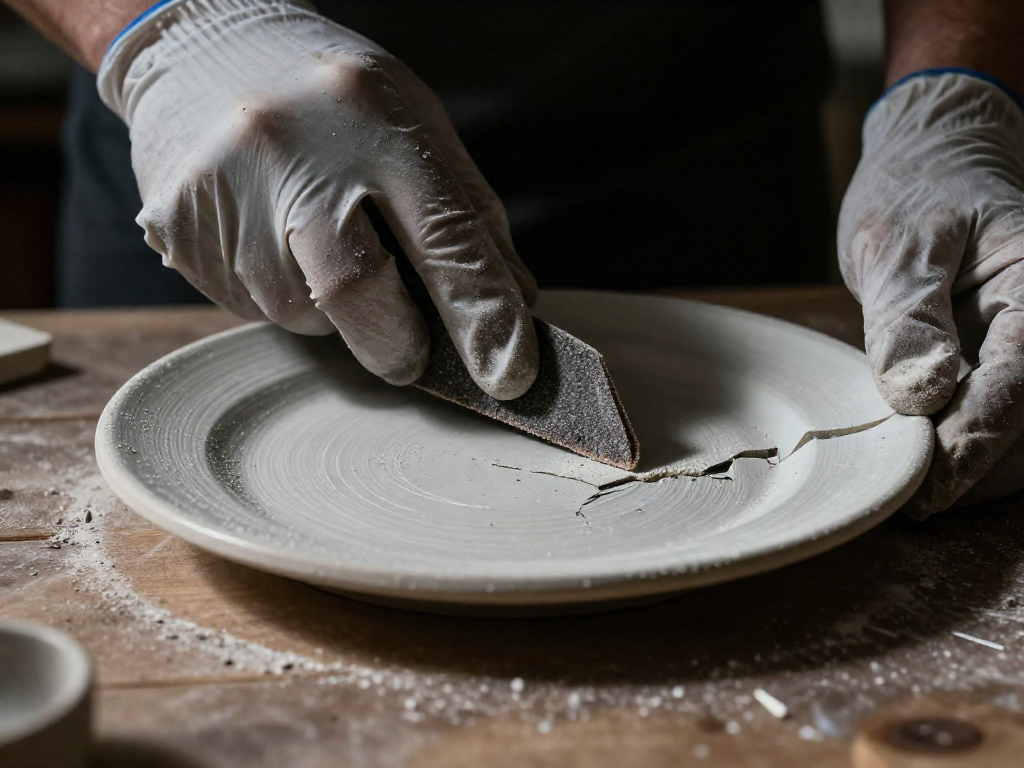
Now, take the glaze off. For small or curved pieces, use coarse emery paper or 80-grit sandpaper and work the entire bonding area until it’s uniformly dull and rough. Larger flat areas are faster with an angle grinder and a flap disc. The goal is a consistent matte finish, not deep gouges. After abrasion, wipe down the surface again with acetone or isopropanol, using clean paper towels and wiping before the solvent evaporates—this lifts the dust instead of just moving it around.
Let the solvent flash off completely. Acetone and isopropanol evaporate fast, but if you’ve used a slower solvent like MEK, give it a few extra minutes. Any trapped solvent can weaken the adhesive or cause bubbles during cure. Once the surface is dry to the touch and free of any residue, you’re ready to apply the epoxy and clamp the pieces.
Preparing the Metal Surface: Roughen, Clean, and Prime
Preparing metal is just as decisive as prepping ceramic—skip it and even the best epoxy will peel right off. The goal is a surface that’s perfectly clean, roughened, and primed for the adhesive to grab.
Start by degreasing. Any oil, wax, or fingerprint residue will act as a release agent. Wipe the metal with a solvent like lacquer thinner or acetone, using clean paper towels, before you even pick up sandpaper. This is critical: if you sand first, you’ll grind the contamination deeper into the surface. Wipe before the solvent dries, then let the metal air-dry completely. (WEST SYSTEM emphasizes this sequence in their surface prep guide.)
Once the metal is clean and dry, create tooth. For general use, sand with coarse abrasive—80-grit works well—or use a sandblaster. The idea is to scratch up the surface to increase surface area for the epoxy to key into.
Steel demands an extra step. Sand or grind down to bright, shiny metal, then immediately apply a thin coat of epoxy. While that coat is still wet, sand it again—this forces the epoxy into the metal’s freshly exposed pores. Bond or apply your second coat while the first is still tacky. This primer coat technique dramatically improves adhesion to steel.
For aluminum, dry sand with 80-grit before applying epoxy. If you wet sand, just be certain the piece is bone-dry before any adhesive touches it. After sanding, wipe away dust with a clean rag and another quick pass of solvent, then let it dry. Your metal is now ready for the main adhesive.
Choosing the Right Epoxy Adhesive for Ceramic-to-Metal
For ceramic-to-metal bonds, skip the super glue and reach for a two-part epoxy. Cyanoacrylates are brittle and poor at filling gaps; epoxies deliver the shear strength and durability you need, especially when the joint faces moisture or moderate load. As a rule, slower-curing formulas build a stronger, more resilient network—though modern fast-set options are closing the gap.
If speed is your priority, J-B Weld ClearWeld sets in about 5 minutes, cures in an hour, and claims a tensile strength of 3,900 PSI, according to testing by Bob Vila. Its sibling, MinuteWeld, kicks in under a minute but gives you a lower 2,300 PSI. For a repair where ultimate strength matters more than time, consider a slow epoxy. Ceramic-Bond 24 offers a generous 60-minute pot life and a lap shear of 2,900 psi on aluminum, with a full cure taking 24 hours at room temperature or just 4–6 hours if you warm it to 65°C. Lakeside Pottery’s studio epoxy, at 3,600 PSI, is another high-strength contender.
When the repaired piece will contact food—a mug handle or a ceramic lid—you need a food-safe adhesive. Permabond ET5145 is a 1:1 mixable epoxy that meets FDA 175.105 and 175.300, making it safe for incidental food contact (Permabond).
No matter which epoxy you pick, dispense equal amounts of resin and hardener onto a disposable surface, mix thoroughly for about 30 seconds, then apply to one surface, press or clamp the parts together, and leave them undisturbed for the full cure time. Rushing this step is the single most common cause of a weak bond.
Step-by-Step Application: Mixing, Clamping, and Bonding
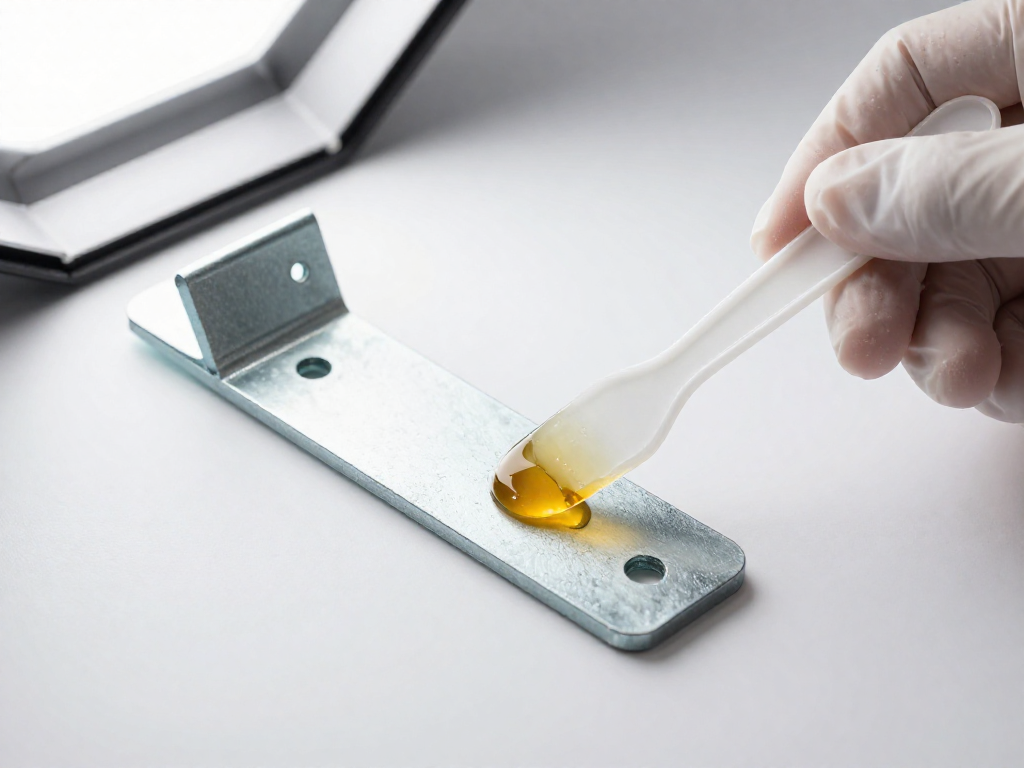
With both surfaces properly prepared, you're ready to mix and apply the epoxy. Squeeze out equal amounts of resin and hardener onto a disposable mixing surface—a scrap of cardboard or a plastic lid works well. Stir the two components vigorously for about 30 seconds until the mixture is streak-free and uniform in color (Sylmasta). If your epoxy has crystallized from cold storage, warm it gently at 52°C (125°F) for 30 minutes before dispensing to restore normal reactivity. Once mixed, you typically have only a few minutes of working time, so move deliberately but don’t rush to the point of sloppiness.
Spread the mixed epoxy onto just one surface—the metal or the ceramic, whichever is easier to handle—as a thin, even layer. Then immediately press the parts together and make any final alignment. You won’t get a second chance with a fast-set epoxy, so check positioning right away. Once aligned, the bond needs steady, even pressure until the adhesive cures. For small, flat items, a simple spring clamp or a weight (gravity alone) is often enough. For awkward shapes, consider a swivel vise to hold both pieces at the right angle. On really heavy or large assemblies—think a massive ceramic planter or a metal sculpture—ropes and winches can pull the parts together securely.
Don’t overtighten; just firm, contact pressure is sufficient. More force won’t make the bond stronger and could squeeze out too much adhesive. The key is maintaining that pressure without disturbance for the full cure time. Depending on the formulation, this could be anywhere from 5 minutes to 24 hours at room temperature. Check your epoxy’s datasheet: some industrial options, like Ceramic-Bond 24, can be accelerated to 4–6 hours at 65°C (150°F) if you can safely warm the assembly. Until the epoxy has fully hardened, leave the piece alone—even a tiny shift can weaken the bond. Once cured, the joint should be ready for light use immediately, though many epoxies continue to develop final strength over the following day.
Curing Tips for Maximum Strength
Epoxy full cure times range from 1 hour for quick-set formulas to 24 hours for industrial epoxies, and slow-curing types generally build a stronger, more durable bond. You can safely cut wait times by adding gentle heat. One proven trick: place the epoxy cartridge in a 140°F wax warmer and put the repaired object in a heated box set to the same temperature—this dramatically shortens the set time without hurting strength (Lakeside Pottery). If your resin or hardener has crystallized, warming the components to 52°C (125°F) for 30 minutes before mixing restores full reactivity. No matter which speed‑up you choose, don’t move, wiggle, or stress the joint until the bond is fully cured. Even after the adhesive feels hard, it needs the full cure time to reach max strength. Contact pressure is enough for a strong bond, but only if you hold it steady right through the end of cure.
Common Mistakes That Ruin Ceramic-Metal Bonds
Most ceramic-to-metal bond failures trace back to a handful of avoidable mistakes. The biggest is skipping the glaze removal—epoxy won’t grip a slick, glossy surface, so abrasion and a final wipe with acetone are non-negotiable. Equally fatal is reaching for super glue (cyanoacrylate) instead of a gap-filling epoxy; the thin glue can’t handle the irregular fit. Hasty mixing—less than 30 seconds—leaves the epoxy weak (Sylmasta), and forgoing clamps lets the joint shift as it cures. Finally, don’t load the repair early: even a “fast” epoxy needs at least 4–6 hours for full strength.
Final Checklist for a Professional Repair
Before you walk away, confirm: ceramic abraded, degreased, dry; metal roughened, cleaned, primed if needed; epoxy fresh and mixed well; parts aligned and clamped until fully cured; undisturbed for full cure time (with gentle heat if desired).
Sources
- 5 Hard Surfaces Recommended for Epoxy Coatings (and 3 that are NOT) - Xtreme Polishing Systems — xtremepolishingsystems.com
- Ceramic Bonding Adhesives | Permabond Engineering Adhesives — permabond.com
- Tech Tip 13 - Surface Preparation for Epoxy Bonding: Why It Matters and How to Do It Right - Meridian — meridianadhesives.com
- Preparation of Surfaces for Epoxy Adhesive Bonding — smooth-on.com
- Surface Preparation — westsystem.com
- Surface Preparation | WEST SYSTEM Epoxy — eu.westsystem.com
- The Best Glues to Repair Your Most Treasured Ceramics, Tested — bobvila.com
- Best Glue for Ceramic, Pottery & Sculpture Repair: Epoxy vs. Super Glue — lakesidepottery.com
- Ceramic-Bond 24 Highest Strength Industrial Grade Epoxy Adhesive Hardens Within 24 hours — atomadhesives.com
- Metal Bond Rapid 5 Minute Epoxy Adhesive | Sylmasta — sylmasta.net
- How to Hold Broken Ceramic Pieces in Place While Epoxy Cures | Ceramic Repair Alignment — lakesidepottery.com
FAQ
Can I use super glue instead of epoxy for ceramic to metal?
No, super glue (cyanoacrylate) isn't suitable for ceramic to metal. It lacks the strength, gap-filling ability, and resistance to moisture, heat, and load that epoxy provides. Stick with a two-part epoxy for a durable bond.
How long does epoxy take to fully cure?
It depends on the product. Fast-set epoxies like J-B Weld ClearWeld cure in about 1 hour, while industrial-grade options like Atom Adhesives Ceramic-Bond 24 need 24 hours at room temperature or just 4–6 hours if heated to 65°C. Always check your epoxy's instructions.
Do I need to clamp the pieces?
Not necessarily, but you must hold the pieces tightly together until the epoxy fully cures. Contact pressure is adequate, so you can use gravity, painters tape, or simple weights if they keep the joint aligned without moving.
Is the repair food-safe?
Most general-purpose epoxies are not food-safe. If the repaired item will contact food, use a specific food-safe epoxy like Permabond ET5145, which is FDA-compliant. Otherwise, keep the repair away from food surfaces.
What if the ceramic piece has a decorative glaze?
You must remove the glaze from the bonding area. Sand, grind, or grit-blast that spot until the glossy surface is gone, then wipe it clean with acetone or isopropanol and let it dry completely before applying epoxy. Epoxy won't stick to an intact glaze.
See also
- Best Epoxy for Metal Repairs
- How to Glue Broken Ceramic
- Surface Preparation for Epoxy Bonding
- Food-Safe Adhesives for Kitchenware
Related articles
Attaching Foam to Wood: Craft vs Structural Applications
How do I glue foam to wood without melting or weakening the foam?
Jul 22, 2026 · 6 min read
Joining Concrete to Wood: The Right Adhesive for Fence Posts and Decks
Which adhesive is best for attaching wood to concrete in outdoor projects?
Jul 22, 2026 · 11 min read
How to Bond Acrylic to Metal: Achieving a Clear, Strong Joint
What's the best adhesive for bonding acrylic (plexiglass) to metal without clouding?
Jul 22, 2026 · 6 min read